Every bakery I've worked at, has always had that classic pink box to package their cakes in. As a home baker, buying in bulk can be quite expensive. Not to mention, most boxes come in one size, with little room to give. I thought, "There must be another option". After much trial and error, I found a way to make a box that not only holds my cakes, but also displays them just as well as a professional box would. And the best part is-
it costs around $1.00 and you can customize it to each order! I chose blue poster boards because it matches my logo stickers perfectly! This is my first tutorial, so please forgive me if I don't do it well.
Supplies Needed:
- 2 poster boards
- clear gift wrap
- hot glue gun
- exacto knife
- ruler
- a piece or cardboard, or a fancy craft mat (to protect your table from cuts!)
- the cake board you will use for your cake/ cupcakes (not pictured)
Step 1: Take one poster board and lay the cake board you will use for your cake and measure around it. Give a little freedom, about 1/8-1/4 inch. I like to use this fat ruler because it is the perfect height for most of my small cakes. It measures about 4 1/2 inches.

Step 2: Lightly score the poster board. DON'T cut it all the way through. Just make a nice line that will make for a clean fold later. Do this with all 3 sides.
Step 3: Place the cake board back on the poster board and measure where the last side will start. Lightly score this line as well. I do both sides of the ruler so I can cut off the excess later.
Step 5: Cut off the excess with your exacto knife.
Step 6: Cut ONE slit on each corner to make a flap.
Step 7: Using your hot glue gun, apply a liberal amount of glue. I like to put a lot so the flaps don't catch on each other when you put the lid on.
Step 8: Hold the flap to the inner part of the poster board for a few seconds until it sticks.
Step 9: Repeat step 8 for all 4 sides.
Step 10: Take your second poster board and repeat steps 1-6. The only thing you want to do different, is make the sides about 1/4 of an inch shorter. This allows the top to close smoothly over the bottom. You can see in the picture that I adjust my ruler just a little bit.

Step 11: Once you've done the three sides, and you need to finish the last side, use the bottom box you've already made as a guideline. Make sure to also give about a 1/4 inch space.
Step 12: Cut ONE slit in all four corners of this one as well. However, do not jump to the glue gun just yet.

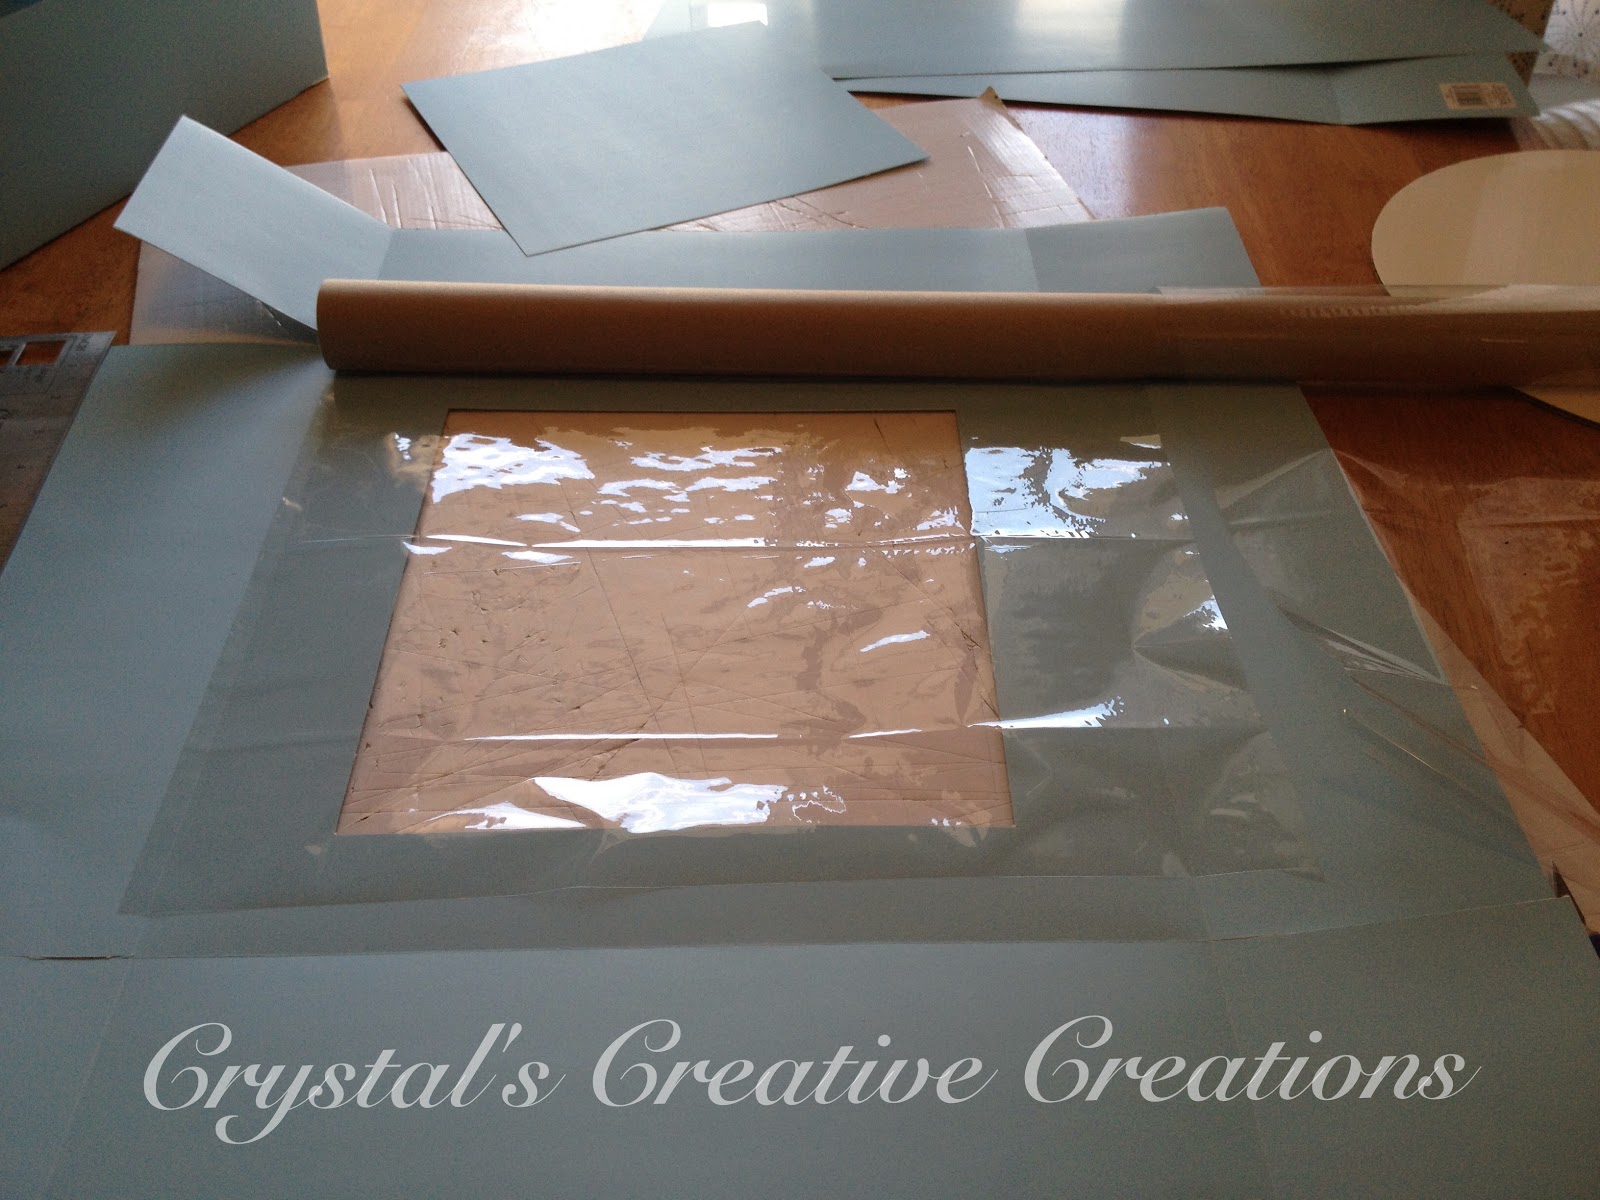
Step 13: Cut a square out of the middle. You can make this as big as you like, but I usually go with about 2 inches from the edge where it's folded.
Step 14: Measure out a piece of gift wrap that will cover the hole. Leave about and inch all the way around.
Step 15: Attach the piece of gift wrap with a thin line of hot glue, all the way around.
Step 16: Repeat step 7 by using your hot glue gun to attach all the corners.

Step 17: Place lid on top of the bottom. Congratulations! You just made your very own cake box!
****TIPS****

If you can tell from this photo- the scoring of the board is just a thin line, DON'T cut all the way through. You just want to make it easy to fold, not fall apart. Which I have done several times!
If you don't have a fat ruler like mine, just use a regular ruler. Make marks along all the way across of the size you want for the sides and line it up with your ruler.
Also, hot glue guns have the tendency to make strings of glue. Do a quick spot check to make sure you don't have any strings hanging off your box.
For cupcakes, I don't use a insert that holds them all in place. I simply attach the cupcakes to a cake board with small dot of butter cream.
Here are some photos of some boxes I have made recently in various sizes: